Postingan

Menampilkan postingan dari Juni, 2016

How to Install TWRP Recovery & Root Galaxy J7 on Android 6.0 [J700H]
Gambar
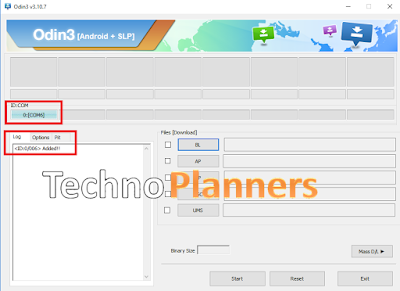
Recently, Samsung rolls out Android 6.0.1 [6.0] Marshmallow for Galaxy J7 and J5. Here we are telling How to install TWRP Recovery and Root Galaxy J7 by uses ODIN. This method is tested, but do it with your own risk I am not responsible for any damage, delete files and other issues. Before doing root or installing custom recovery take a backup of Photos, Music, Documents and other important data. Requirement SuperSU Zip TWRP Recovery ODIN for PC Samsung USB Drivers for PC ( Download all files from end of the Post ) Device battery at lest 40% Charged Install USB Drivers on your PC First, you have to install the USB Drivers on your PC. So, Download USB_Drivers from end of post. Once it downloaded, Connect your J7 to PC using a data cable and Run setup and install it. How to Install TWRP Recovery on Galaxy J7 Download ODIN and TWRP Recovery on your PC. Extract both Odin and TWRP Zip file using WinRAR and you will get a twrp-2.8.7.0-j7elte_2.tar file and Odin Software. Run ODIN on your PC
Android N-ify - Use features introduced in Android N on your 5.0, 5.1, 6.0, 6.0.1

In this tutorial I will teach you how you can Get the Android N 7.0 Easter Egg, Settings menu, QS tiles and notification features on your older Android Lollipop 5.0, 5.1 and Marshmallow 6.0, 6.0.1 for free with root or without root. You can Run your PC as a Android with Remix OS Dual Boot. Requirement Android Device Running on Lollipop and higher Custom TWRP/CWM Recovery Pre-Installed Xposed Application Android N-Ify ( Download all files from end of the post ) How to Install N-IFY on Any Android First, you have to install xposed App on your device. So, Download Xposed Apk and Xposed framework according to your device processes. Here is a different framework file and you needed to find the right file for your device “SDK21” refer to Android 5.0 , “SDK22” refer to 5.1 , and “SDK23” refer to 6.0 and higher and   “arm” refer to ARM processor , “arm64” refer to 64-bit ARM processor , and “x86” refer to Intel processor. So, since I have an ASUS Zenfone 5 which has a 32-bit intel processor

How to Update Zenfone 2 Laser to Marshmallow firmware? Complete Guide

Gambar
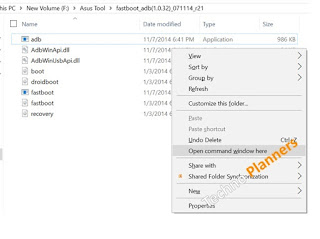
Hello Guys ASUS roll out Marshmallow official firmware for ASUS Zenfone 2 Laser ZE550KL. Here is a complete guide to server methods first is ADB and the second is an OTA update. An old post we talk about How to Root Zenfone Max step by step. Before Update Before you go to the next step please make sure backup your personal photos, Games, contract and other data. Because after update your internal storage decreases the size of storing it can fail to update or remove some files from your Android phone. Make sure before update currently your device running on latest Lollipop firmware. Otherwise, it will be failed to update your device. You can also check out More Tutorials on ASUS Zenfone's device Requirements Marshmallow Firmware, Download all files from end of the post ADB Tool only for Method 1 Intel USB Drivers [Method 1] Device Running on Most latest Lollipop firmware How to Update Zenfone 2 Laser to Marshmallow [Method 1] Download the firmware and ADB Tool from end of post Dow